
So this is my first try at this on the blog but it sounded like a hoot so here we are! A group of bloggers was challenged to make a low cost holiday craft that relied heavily on items that you can purchase at Dollar Tree. I present to you – the Advent Garland!
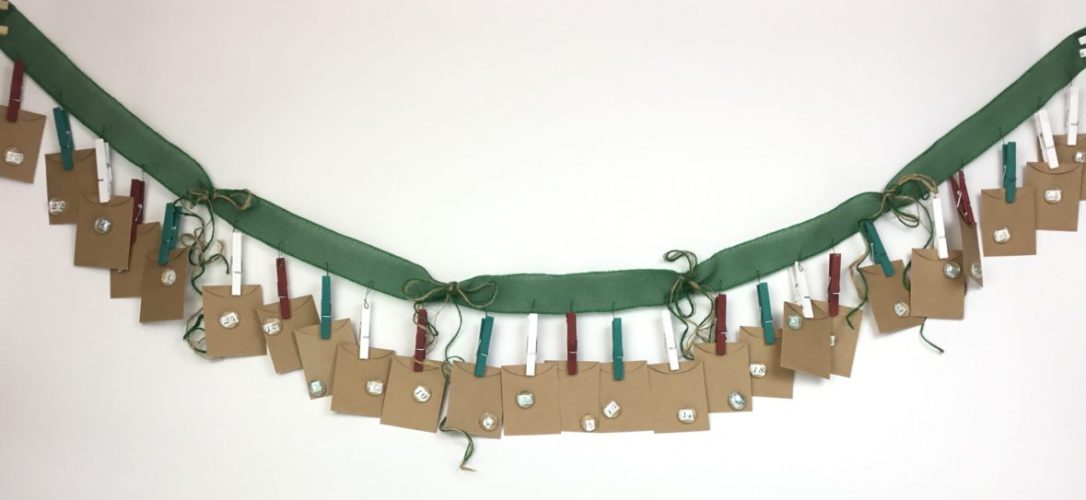
Put treats, love notes, gift cards, or handmade coupons in each envelope, and let the family open a numbered envelope every night!
First off, I headed to the Dollar Tree to see what inspired me as far as crafty stuff for the holidays goes. I wound up with this in my basket –

Foam brushes for the paint, wide, wired, jute-look ribbon, flat backed clear glass “stones”, clothespins, ornament hooks, and a pack with natural and green colored twine. I was definitely thinking rustic!
From my craft stash and the craft store I added three bottles of Plaid Folk Art Chalk Paint, one each in Tuscan Red, White Adirondack, and Grotto; a sheet of small number stickers, and a packet of 25 small envelope in a natural color to echo the twine (they are also available in white). Some scissors, some glue – either E6000 or high temp hot glue – and you are all set to go. I prefer the E6000 for longevity and avoiding having your project melt if it’s over an actual mantel with an actual fire, but I used hot glue in the video for speed.
Step One
Separate the clothespins into halves by removing the springs. See video for more info on this and all the other steps! This is so the paint doesn’t get on the springs.
Paint one side of the clothespins, about a third each in each color, allow to dry, then paint the second half.


When they are completely dry, reassemble them by putting the springs back on. Make sure the bottoms line up with the bottoms!


Next, twist the bottom of the ornament hooks into a tighter loop so the glue has something to grab onto, and glue one onto the back of each painted clothespin, near the part that would be on top in use (the pinchy side, not the grabby side).


(Please pardon my manicure – it looked like a massacre from WestWorld up in here after I was done with the red paint!)
Next it’s time for the envelopes – stick a number sticker from 1 – 24 or 25 on each one, and finish with a clear gem on top, again using either E6000 or hot glue (both dry clear). I put mine in random places so I wouldn’t have to measure the center for each one, but you could also measure with a ruler to make sure your numbers were exactly centered.

Cut the wired ribbon to your desired length OR decide how close you want your clothespins visually – dealer’s choice. Fold the cut edge under twice to the back so it doesn’t fray.
Twist the ornament hooks to the back, and insert them through the wired ribbon, either alternating colors symmetrically like I did, or randomly. Pinch the hooks closed so they don’t pop out.
After every group of five clothespins, tie a bow using about a 25″ strand of each of the green and natural colors that came in the pack.

Cut and fold the other side of the ribbon like you did the first side.
Now stuff your envelops and clip away! I like the numbers in a random order so the piece looks nice right up until Christmas, but you can order them 1 – 24/25 if you prefer.

If you have little ones in the house you could also have them color or put stickers on the envelopes to make them even more fancy!
Thanks so much for stopping by and I hope to see you again soon!
And here are some other wonderful crafts from the Dollar Tree Challenge!
